ComfyUI Infinite Talk: Create Realistic AI Talking Avatars from a Single Image
A step-by-step guide to transforming a static portrait into a realistic, talking video using ComfyUI.


Following up on previous explorations into consistent AI voice generation and controlling ComfyUI via its powerful API, the next logical step is to combine these concepts into a complete, automated pipeline.
The Goal: Animating the Inanimate
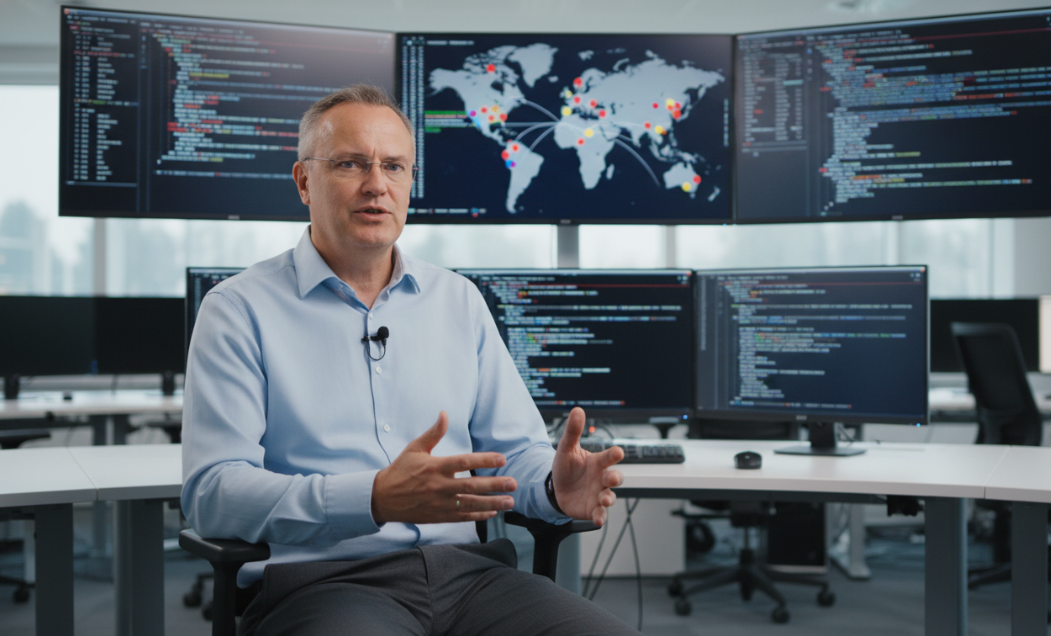
The core objective is to create a dynamic video from a single portrait image, making it appear as though the person in the photograph is speaking the words from a provided audio track.
Here’s the photo that will be animated.

I used NanoBanana to place me in a clean office setting.
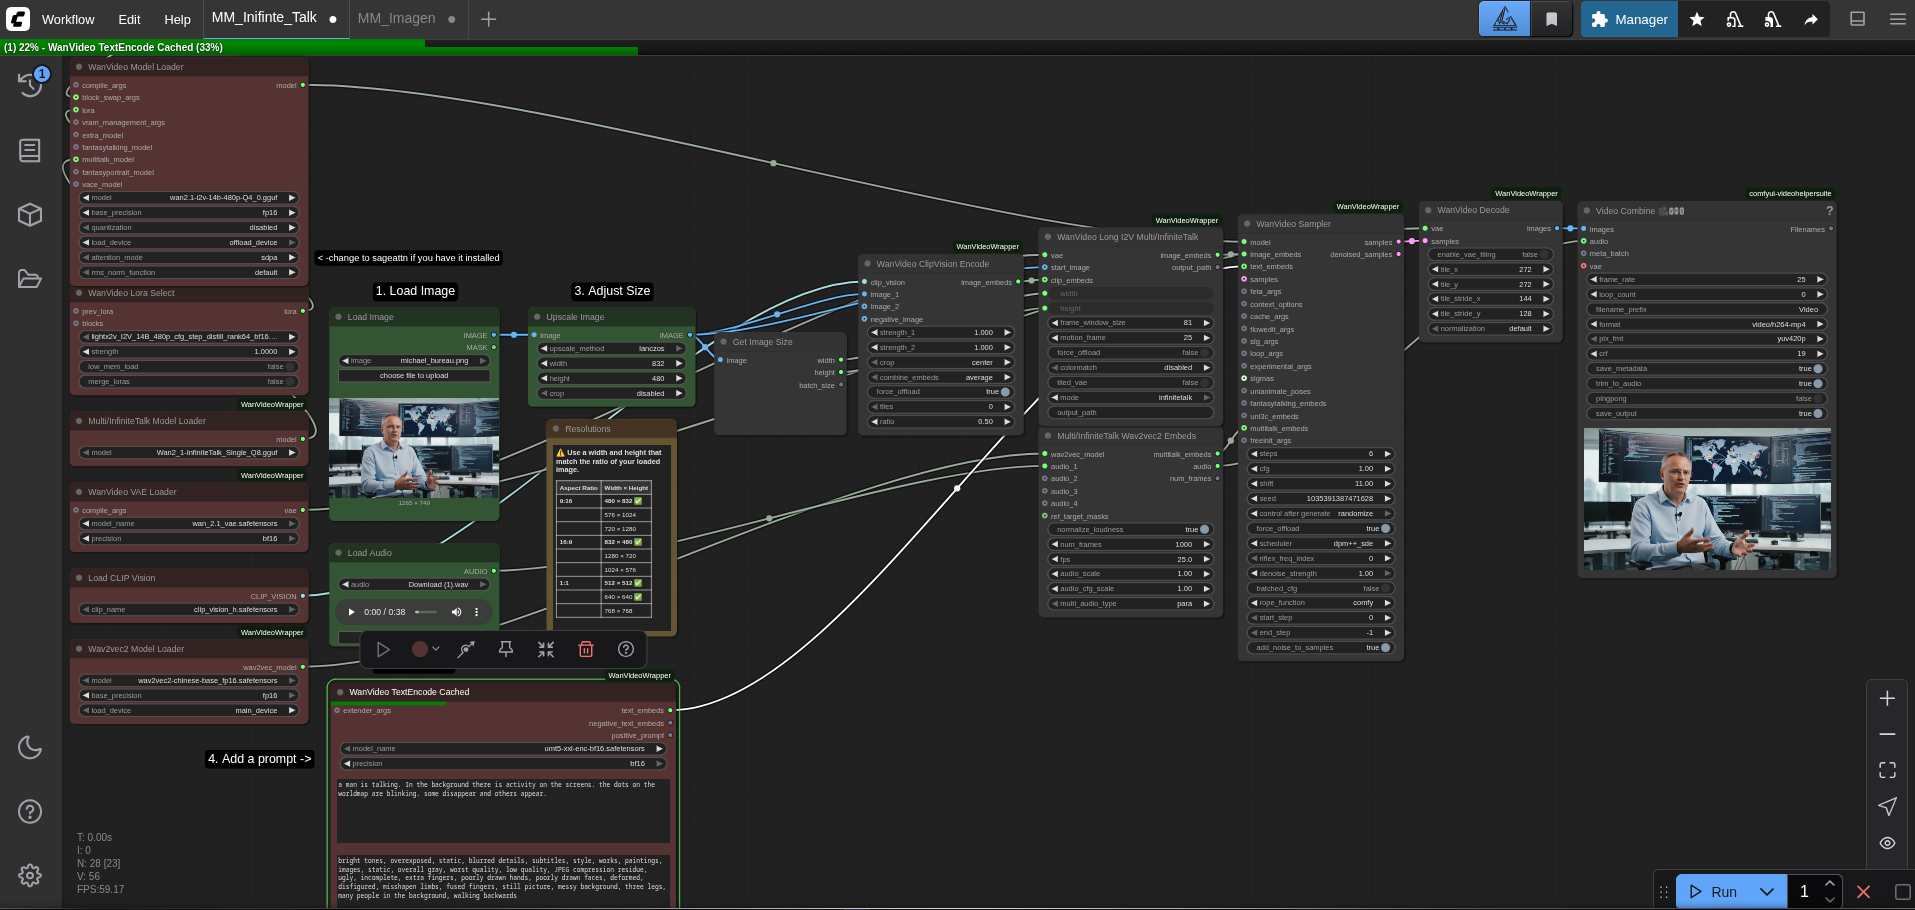
Here’s a full breakdown of the ComfyUI workflow used to animate the image:
Prerequisites: Gathering the Tools and Models
Before the workflow can be executed, a specific set of custom nodes and AI models must be installed and correctly placed within the ComfyUI directory structure.
Required Custom Nodes
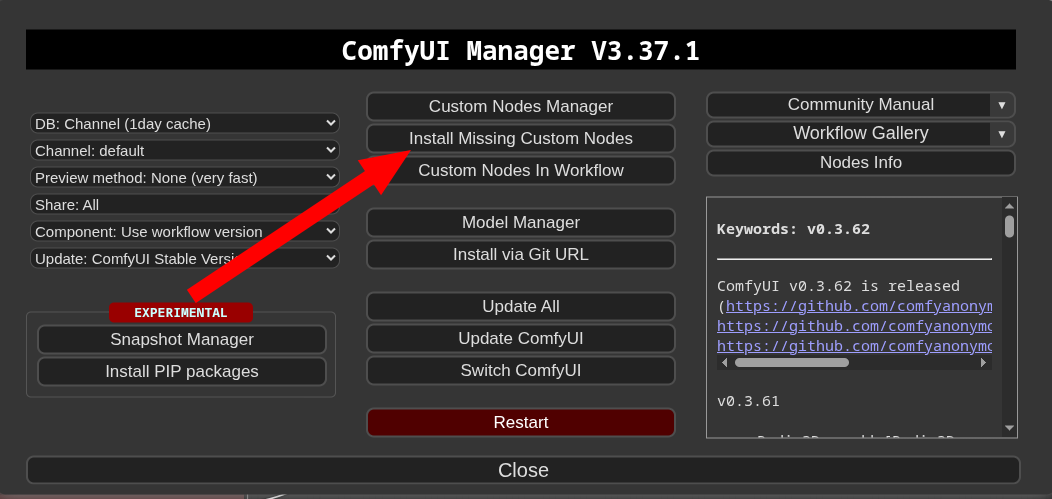
These nodes add essential functionality to ComfyUI and can be installed using the ComfyUI Manager:
- ComfyUI-WanVideoWrapper: A comprehensive toolkit for advanced video models.
- ComfyUI-VideoHelperSuite: Provides nodes for combining image frames and audio into a final video file.
- rgthree-comfy: A set of helpful utility nodes, including custom labels and workflow organization tools.
They are easily obtainable through the ComfyUI-Manager:
Required Models
Each model plays a specific role in the generation process. ComfyUI/models/.
| Model Filename | Download Link | Placement Directory | Purpose |
|---|---|---|---|
wan2.1-i2v-14b-480p-Q4_0.gguf |
Hugging Face | diffusion_models |
The primary Image-to-Video (I2V) model. |
lightx2v_I2V_14B_480p...safetensors |
Hugging Face | loras |
A LoRA that improves motion stability. |
Wan2_1-InfiniteTalk_Single_Q8.gguf |
Hugging Face | diffusion_models |
The core model for lip-syncing and talking motion. |
wan_2.1_vae.safetensors |
Hugging Face | vae |
Variational Autoencoder for image processing. |
clip_vision_h.safetensors |
Hugging Face | clip_vision |
Encodes the input image for the model to understand. |
wav2vec2-chinese-base_fp16.safetensors |
Hugging Face | wav2vec2 |
Processes the audio file to analyze speech patterns. |
umt5-xxl-enc-bf16.safetensors |
Hugging Face | clip |
Text encoder used for interpreting the prompt. |
The "Infinite Talk" Workflow: A Step-by-Step Breakdown
The workflow operates by passing data through a series of connected nodes, each performing a specific transformation.
Step 1: Loading the AI Brains (Models & Loaders)
The process begins on the left side of the workflow, where all the necessary models are loaded into memory. WanVideoModelLoader, which is responsible for the image-to-video generation, the MultiTalkModelLoader for the speech animation, and the supporting VAE, CLIP, and Wav2Vec models. WanVideoLoraSelect node is also used to load a LoRA model that enhances the stability and quality of the final video.
Step 2: Providing the Source Material (Image, Audio & Prompt)
The central inputs to the workflow are the source image and the audio file.
- The
LoadImagenode is used to select the portrait to be animated (michael_bureau.png).ImageScalenode to ensure its dimensions (832x480) are compatible with the model. - The
LoadAudionode loads the speech (explain.mp3) that will drive the animation. - Finally, the
WanVideoTextEncodeCachednode takes a simple positive prompt (e.g.,a man is talking) and a detailed negative prompt to guide the generation process and prevent unwanted artifacts like distorted features or a static background.
Step 3: The Core of Generation (Processing & Sampling)
This is where the core synthesis occurs. MultiTalkWav2VecEmbeds to create audio embeddings. WanVideoSampler.
Step 4: Final Assembly (Decoding & Video Combination)
Once the sampler has generated all the frames in latent space, the WanVideoDecode node translates them back into a sequence of viewable images. VHS_VideoCombine node. LoadAudio node.
Practical Demonstration: The Results
To showcase the workflow's capability, two videos were generated.
Video 1: Generated with VibeVoice using my original voice as reference
Since I’m using an English model for lip-sync video creation, the results look a bit off when applied to German.
Video 2: Generated with a synthetic voice
The results demonstrate the workflow's flexibility in handling different audio sources while maintaining consistent character identity and accurate lip-syncing.
A Note on Performance: Managing VRAM
High-resolution video generation is a resource-intensive task, particularly on consumer-grade GPUs with limited VRAM. I implemented the WanVideoBlockSwap node, which is designed to mitigate this issue. So if you run out of memory, you can just enable this node to offload VRAM into RAM.
Conclusion
By combining ComfyUI’s modular workflow system with the WanVideo and InfiniteTalk models, the process becomes predictable, scalable, and adaptable to different voices, prompts, and motion styles. With the right node configuration and model selection, the system delivers stable motion, clean lip-sync, and consistent character identity, even on limited hardware. This marks a clear step forward in my broader effort to build a fully automated pipeline for AI-generated video, setting the stage for more advanced experiments and future refinements.